How To Paint Kitchen Cabinets With A Spray Gun – DIY
Kitchen renovations can be expensive! Paint can create such a huge transformation! I’ll show you how to paint kitchen cabinets with a spray gun – DIY and save a ton of money! It does take a lot of elbow grease and time, though! So if you are wanting to do a kitchen renovation and paint cabinets yourself, you can do it! It takes a lot of work and determination, but the finished project is so satisfying!

This post may contain affiliate links, which means I make a small commission at no cost to you. See my full disclosure here.

I have painted my kitchen cabinets in two of our homes over the years. The first time I used oil-based paint and paint brushes. I fought and fought to get the cabinets smooth with the least amount of brush marks showing. It was a lost cause. The oil-based paint held up pretty well over the years and it was still a huge improvement over the 1990s pickled oak cabinets! This time around we are lightening up our dark oak cabinets and boy was I looking forward to that.
How To Paint Kitchen Cabinets With a Spray Gun – DIY Step by Step
Materials and Tools Needed
Step by Step Instructions
Step 1: Picking Your Paint And Color
This time around we are using Benjamin Moore Advance, which is a waterborne alkyd paint. It combines the ease of latex paint and the durability of oil-based paint. We chose to use Semi-Gloss because it’s the most durable for high-traffic areas and it’s easy to clean. I think this is the best option for kitchen cabinet finishes.

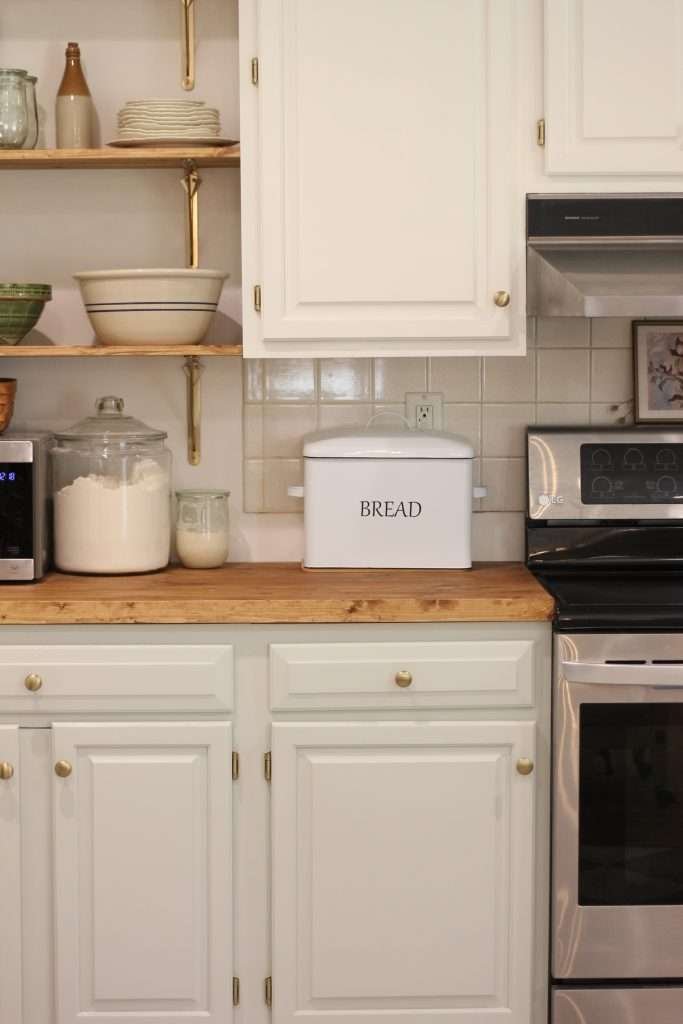
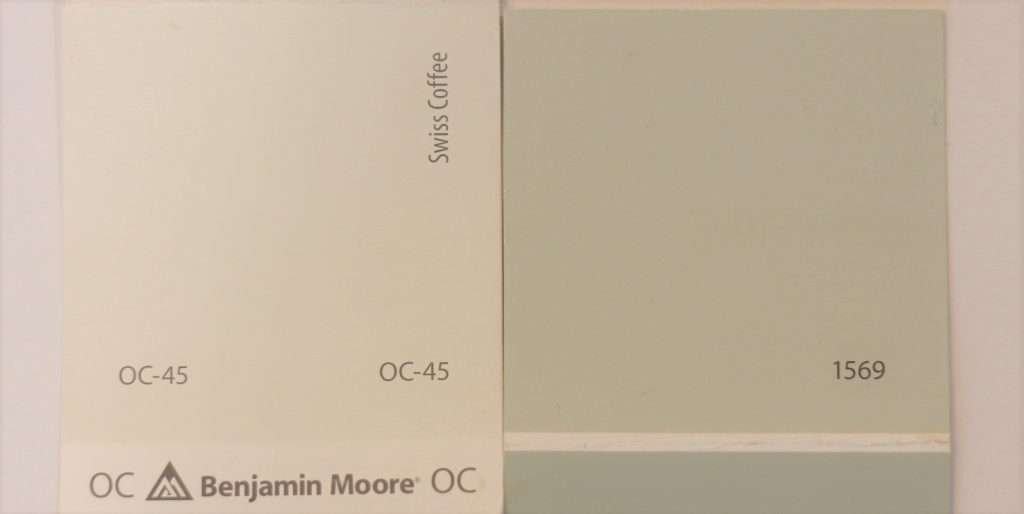
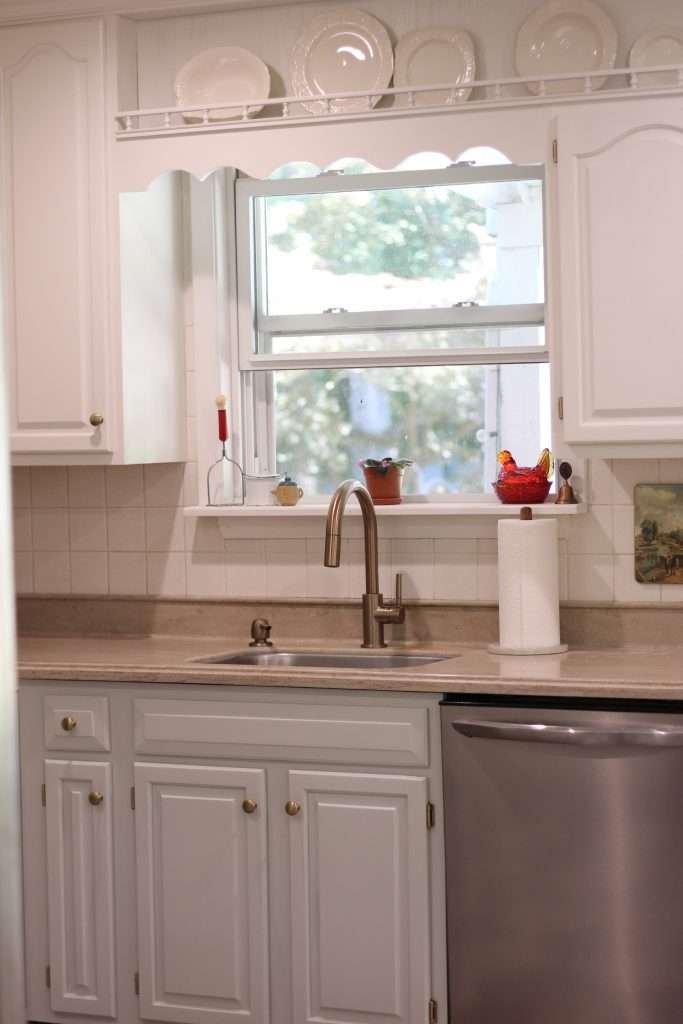
Picking the color for the cabinets definitely took the longest time for us. We took a couple of trips to the paint store to get color swatches. I kept going back and forth between using Benjamin Moore Natural Cream and Benjamin Moore Swiss Coffee. In the end, I choose Swiss Coffee for our upper cabinets and went with a different color for the lower cabinets. I choose Benjamin Moore Night Mist which is a subtle green-gray for the lower cabinets. The two colors together are beautiful and it’s a very subtle difference in the two colors.

Step 2: Prepping Your Kitchen Cabinets For Paint
The first step to painting your kitchen cabinets is to prepare them for paint. Start by emptying your cabinets. (I felt like I was living in an estate sale will all the things from my cabinets all over my kitchen table and surrounding areas!) Then give them a good cleaning. They need to be free of any grease and dirt. The paint will not adhere if there is any grease or dirt! I used Liquid Sandpaper, which is a de-glosser and degreaser.

Step 3: Make Any Necessary Repairs
After all of my cabinets were cleaned I filled all the holes from the old hardware since we were not using the same hardware. At this point, I removed all the drawer fronts from the drawers to give me an easier time finishing both sides of the drawer. I used wood filler to fill any holes I didn’t need anymore and also filled some scratches and cracks. You want your cabinets in good condition before you paint them. So do any repairs at this point.

Step 4: Sanding
After the repairs are done and the wood filler has dried, it’s time to sand. I used 220 grit sandpaper to scuff up the cabinets to give the paint a good surface to adhere to. The cabinet frames, the cabinet doors, and the drawer fronts all need to be sanded. My boys were super helpful with the sanding part! When all the sanding is done, you will need to wipe down all the surfaces so they are free of all the dust created by sanding. A Tack Cloth works really well for this, but if you do not have one available, a cloth, slightly damp with warm water, can be used instead. Just don’t get the wood real wet!

Step 5: Protecting All Surfaces That Are Not Being Painted
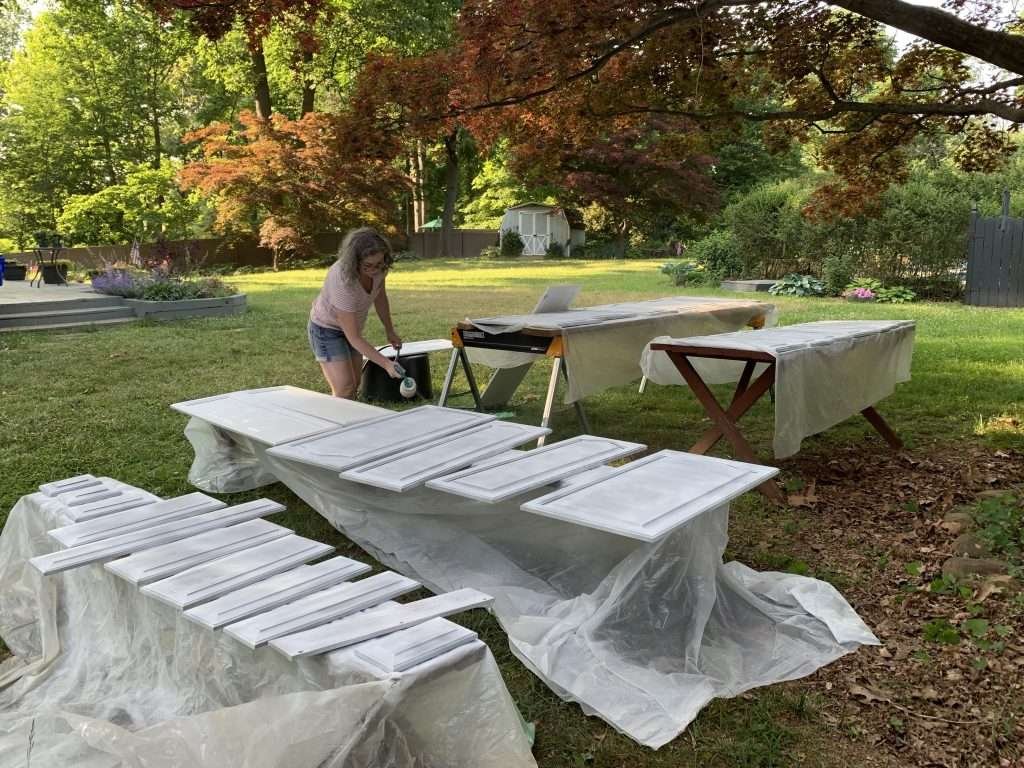
Next, we need to prep our work area. Cover all surfaces that you do not want the paint to get on, like your counters, backsplash, ceiling, and the inside of the cabinets. We went through about 2 rolls of painter’s tape and over a roll of 12 inch brown paper. Our home has an open-concept living area and kitchen, so we covered our furniture as well. We also used several plastic sheeting while we painted the cabinet doors and drawer fronts outside. For the cabinet doors we painted outside, we set up a couple of saw horses with boards across them with plastic sheeting on top and then laid the cabinets on top. Make sure you don’t paint your cabinets in direct sunlight as this could affect how your paint dries. If your paint dries too quickly it could cause an uneven finish.

Step 6: Protecting Yourself
It’s not only important to protect all your counters and any other furniture in your kitchen area that you don’t want paint on, but you need to protect yourself. When you are painting the cabinet bases in your house, you will need to wear a respirator. Otherwise, you will have paint all in your lungs and up your nose. Trust me. I didn’t think of wearing a respirator at first but quickly realized my lack of wisdom in my haste to start to see the transformation. ha! I did not wear a respirator when I painted the cabinet doors outside. Also when you are painting indoors, make sure you have good ventilation. We had open windows with fans in them to blow air out of the house. So, we now have to clean our screens. hahaha… We had our smoke detectors go off at one point because of all the paint in the air before we put fans in the windows. So it was worth having dirty screens over the incessant beeping of the smoke detector.

Step 7: Importance Of Priming Your Kitchen Cabinets
Ok, now we are past all the tedious, not so fun prep work and we get to start seeing changes! But before we put on a fresh coat of paint, we need to put 1-2 coats of primer on all the surfaces. I used the Critter Siphon Gun for the primer. Just be aware that primer coats never look good. It will not cover the cabinets very well, but it will give the paint a good surface to adhere to and it will make your paint all the stronger. For best results, do not skip priming your cabinets! After a couple of hours, the primer should be dry, and then do a light sanding with 220-grit sandpaper to give your paint a smooth surface.

Step 8: Start Painting!
Ok, now for the fun part! With your chosen paint color now in your spray gun, you can start your first coat of paint! Paint the backs of your cabinets first to ensure the fronts have the best finish. There is a learning curve to using a spray gun. Depending on your cabinet style, you will need to find the spray pattern that works for your cabinets. We have very traditional raised panel cabinets and the spray pattern I used may not work best for you. I sprayed all around the edges, then on top of the edges, then in all the groves around the edges, and then finally across the middle panel. Over-spraying the cabinets and the cabinet frames is the best way to avoid drips.
It’s funny, I was telling my husband that it was hard for me at the start of this painting project because I felt like I had to constantly be making quick decisions on which direction to go next with the spray gun. Quick decisions are not my forte. I’m one of the most indecisive people ever! You have to work fast with the spray gun. You can’t stay in one spot for too long or it will pool up paint and cause drips. So, my husband said that I needed to use the spray gun at least once a week from now on to help my indecisiveness. Haha, after a week-long of using the spray gun, I got better at making decisions on where to paint next, but now I need a break!

Drying Times
Let the paint dry for about 4-6 hours between coats of paint. You will also need to lightly sand with your 220-grit sandpaper between each coat. This will give you a smoother finish. We did three coats of paint on the backs of our cabinets before flipping them over and doing the fronts. Make sure you have given your cabinets about 24 hours to dry before flipping them over. We brought our cabinet doors and drawer fronts inside every night.

Home Stretch!
After you are done with the backs, you are in the home stretch! Flip your cabinet doors over and make sure they are ready for paint. You may need to sand or clean off any marks before painting. You want a perfect finish on the fronts of the cabinets or as close to perfect as possible. Continue to sand and wipe off the cabinets between each coat of paint.

Final Thoughts On How To Paint Kitchen Cabinets With A Spray Gun – DIY
So this is a type of project that is not for the faint of heart. I may have broken down and cried a couple of times through this process. It’s tedious, takes a really long time, and is pretty hard. But, it is so worth it! It’s so rewarding to see all of your hard work and know that you just transformed your old kitchen! Sure, it’s easier to hire professional painters, but you just saved a ton of money and made this new kitchen yourself! Just persevere and don’t rush it. Take breaks when you need to. Enlist some helpers, if you can. (My husband and five boys were a big help!) You can do it!!
Overall, I liked the Critter Syphon gun for this project. Near the end of this project, I had some issues with the paint flow. I recommend switching to clean jars of paint or straining your paint during this process. I did 5 coats of paint on the fronts of my cabinets because of this issue I was having with my paint sprayer getting clogged. On the cabinet bases and the backs of the doors, I only did 3 coats of paint.
I am so happy with how it turned out! And I hope you will feel like you can do it yourself, as well! I’m rooting for you!!

My Favorite Supplies For How To Paint Kitchen Cabinets With a Spray Gun – DIY
Here are some of the supplies that I used while doing this project!
Critter syphon paint sprayer
This is a great little spray gun that is easy to use and doesn’t break the bank!
craftsman Air compressor
This is the Air Compressor we used. It’s handy for many projects!
Liguid sandpaper
This worked really well to clean our cabinets!
Respirator mask with filters
This is very important and will make painting indoors with a spray gun much more comfortable.
Folding sawhorses
These sawhorses are great and fold up compact for storage!
Answers To Your Questions About How To Paint Kitchen Cabinets With A Spray Gun – DIY
How much paint will I need?
How much paint you need will depend on the size of the project. We used about 1/2 gallon of primer and 1 1/2 gallons of paint for our cabinets. We have a large pantry cabinet and 13 cabinet bases with 25 cabinet doors and drawer fronts… Just to give you an idea of the size of our project.
What is the best Spray Gun?
For the spray painter, I’m using my Critter Siphon Gun. I have used the Critter for many paint projects including our porch railings and several pieces of furniture. It’s the best paint sprayer and it’s on the cheaper end of spray guns! The Critter Siphon Gun does require an air compressor, which is something we also have used a lot over the almost 20 years my husband and I have been married. I knew the Critter Siphon Gun worked well with small projects and I really hoped it would work great for larger projects like the kitchen! I wanted a smooth finish, and the spray gun did not disappoint… No brush strokes!!
How to Clean out the spray gun?
When you are switching out paints with your spray gun, you will need to make sure you clean it out really well. You need to make sure all tubes and holes are clean of any dried or clogged paint. I found that a thin copper rod worked really well to clean out the tube in the spray gun. Just stick it up in the tube to make sure it’s all clear of clogs. I also used a needle to make sure the tip of the spray gun was also clear.
How long does it take to paint kitchen cabinets?
This is one of those DIY projects that can’t be rushed. This project took us eight days to clean, repair, sand, prime, and paint. The first two days were all prep work. On the third day, I spent priming. The rest of the days I spent painting. I went back and forth between painting the inside bases and while they dried I painted the cabinet doors. Or sanding and wiping everything getting it ready to be painted. It is a lot of tedious work.
How long do you have to wait before putting your cabinet doors and drawer front back on the cabinets?
Letting your paint harden and set completely before installing your cabinet doors back in place is best. For best results wait 24-48 hours.
If you loved this project, you’ll love these projects too:
Did you Do this project?
We would love to see what you have created so mention us @pursuitofhomemaking or tag us using #pursuitofhomemaking so we can see your creations!


